Display issues are a common source of CompTIA A+ 220-1201 questions because they mix hardware, settings, and symptoms. A cracked panel, a bad cable, or the wrong refresh rate can look similar at first glance. This section focuses on the parts and screen attributes you’re expected to recognize fast.
You’ll start with touch screen/digitizer basics, including how input is sensed and why a screen can show an image but still fail to register taps. These details matter when you see “ghost touches,” dead zones, or intermittent response, which often point to the digitizer layer, its cable, or calibration.
You’ll also cover the inverter, a legacy laptop component tied to CCFL backlights. Even though many systems now use LED backlights, the exam still tests inverters because older symptoms are distinct, such as a dim display with a faint image still present.
Finally, you’ll review display attributes that appear in both specs and troubleshooting: pixel density, refresh rate, screen resolution, and color gamut. By the end, you’ll be able to match common symptoms to the right part or setting, and answer typical exam-style questions with clear reasoning.
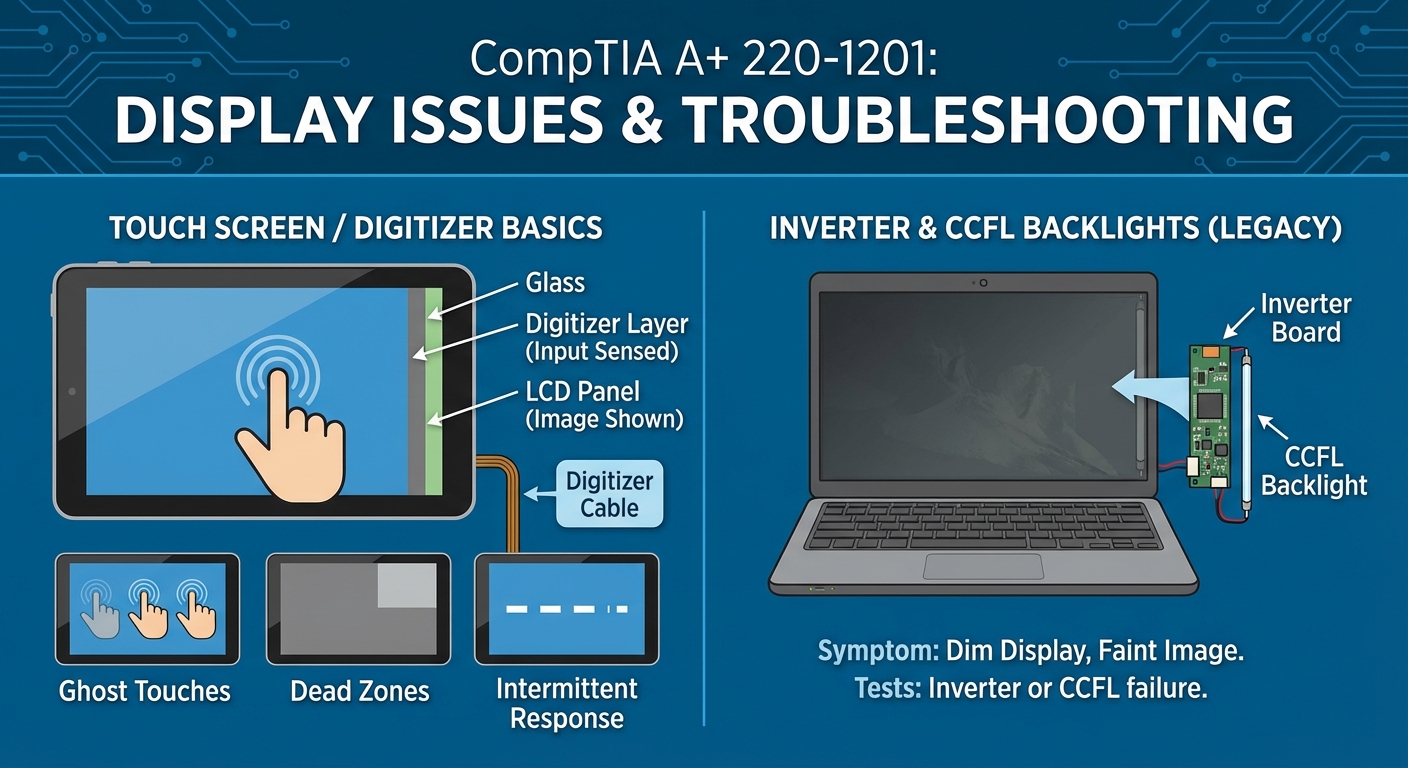
Touch screens and digitizers, what they are and how they work together
A touch-enabled display is really a stack of parts that share the same surface. The LCD (or OLED) makes the picture. Above it sits a sensing system that detects input. Depending on the device, that sensing system may be a finger-focused touch layer, a pen-focused digitizer, or both working at the same time.
For the CompTIA A+ exam, the key is to separate image problems (panel, backlight, GPU, cable) from input problems (touch layer, digitizer, controllers, drivers, calibration). A screen can look perfect and still ignore your taps, or it can accept finger touches but fail to track an active pen with any accuracy. Knowing which layer does what helps you troubleshoot fast.
Touch layer vs digitizer, the job each part does
Think of the display as a sandwich. The LCD is the filling, and the touch sensing parts are thin layers above it. The touch layer is built to detect broad contact, like a fingertip. The digitizer is built to track a precise tool, like an active stylus, with fine position data and often pressure.
In many consumer laptops, tablets, and phones, finger input is handled by a capacitive touch layer. It uses a transparent sensor grid (often a pattern of electrodes) bonded to the glass. When your finger touches the surface, the system senses a change and converts it into coordinates. A small chip called a touch controller reads the grid, filters noise, and sends touch events to the system.
Active pen systems add a separate pen-tracking layer, commonly called the digitizer layer. This is what enables better accuracy for handwriting, drawing, hover detection, and pressure. In active pen designs, the pen and digitizer communicate (often through electromagnetic or capacitive methods), and the digitizer reports much finer data than a finger touch layer typically can.
Common terms you will see in manuals and parts listings include:
- Digitizer layer: the pen-sensing layer (sometimes also used loosely to describe any touch layer).
- Touch controller: the chip that interprets sensor input and reports coordinates.
- Glass: the cover glass that protects the layers and gives a smooth surface.
- Sensor grid: the transparent electrode pattern that detects contact.
When a specific layer fails, the symptoms tend to cluster. Here are quick examples you can use to separate causes:
- If the touch layer fails: the image looks normal, but taps do nothing, multi-touch gestures fail, or parts of the screen stop responding.
- If the digitizer fails: finger touch still works, but the stylus won’t write, won’t hover, or has severe jitter and poor accuracy.
- If the touch controller or its connection fails: you may see total loss of touch, intermittent touch, or “ghost” inputs that come and go with movement or pressure on the lid.
Common touch technologies you should recognize for the exam
For Objective 3.1, the most practical comparison is capacitive vs resistive. You do not need deep theory. You just need to know how they sense input, where they show up, and what breaks.
Capacitive touch is the modern default for phones, tablets, and most touch laptops. It detects changes caused by your finger (or a capacitive stylus). It supports multi-touch gestures like pinch-to-zoom because the grid can track multiple contact points at once.
Pros are clear in day-to-day use: it feels responsive, supports gestures, and works well under glass. Cons include reduced performance with some gloves (unless the device supports glove mode), and sensitivity to noise if shielding or grounding is poor.
Resistive touch is older and works through pressure. The screen senses input when layers are pressed together, so it can be used with a finger, gloved hand, or a simple plastic stylus. Resistive panels usually do not support smooth multi-touch in the same way modern capacitive systems do, and they tend to look less crisp due to extra layers.
Resistive is less common now, but you still see it in some rugged devices, industrial equipment, POS systems, and kiosks because it can be reliable in harsh conditions and works with many input tools.
A fast way to remember the difference:
- Capacitive: senses contact, best for consumer devices and multi-touch.
- Resistive: senses pressure, still used in some rugged or industrial gear.
Troubleshooting symptoms, dead zones, ghost touches, and pen problems
Touch and pen issues often look like software, but many are hardware or connection faults. A good approach is to match the symptom to the most likely layer, then confirm with quick checks that separate OS issues from device issues.
Here is a practical symptom-to-cause map:
- Unresponsive areas (dead zones): damage to the sensor grid, cracked glass affecting the touch layer, a failing digitizer section, or a partially seated ribbon cable.
- Random touches (ghost touches): electrical noise, moisture, a damaged touch layer, a failing touch controller, a poor ground, or a bad charger (some low-quality chargers introduce noise).
- Touch works but pen doesn’t: digitizer layer failure, pen battery dead (if applicable), pen needs re-pairing, missing digitizer driver, or incompatible pen model.
- Pen works but finger doesn’t: touch layer failure, touch disabled in settings, corrupted touch driver, or a loose touch layer cable (some devices route pen and touch through separate connections).
- Offset touches (you tap one spot, input lands elsewhere): calibration issue (where supported), wrong driver, scaling issues after OS changes, or digitizer firmware problems.
- Palm rejection issues: pen settings misconfigured, digitizer firmware/driver issues, or using a non-supported pen that cannot signal “pen mode” correctly.
Before you open anything, run a short set of checks:
- Clean the screen with a dry microfiber cloth. Oils and moisture can cause false inputs.
- Remove the screen protector or test without a case. Thick protectors can reduce sensitivity and break pen tracking.
- Reboot. Touch controllers can hang like any other device.
- Update drivers and firmware (touch controller, digitizer, chipset, and BIOS/UEFI when recommended by the vendor).
- Re-pair the pen (Bluetooth pens often need this), and replace or recharge the pen battery if used.
- Calibrate touch or pen input if the OS and device support it.
- Test outside the OS when possible (BIOS/UEFI menus, hardware diagnostics, or safe mode). If touch fails there, the issue is more likely hardware.
During handling, protect the hardware. Use ESD precautions, avoid flexing the lid, and never press hard on the glass to “make it work.” Pressure can spread cracks and can damage the bonded layers.
Replacement and repair basics, what you can swap and what you usually can’t
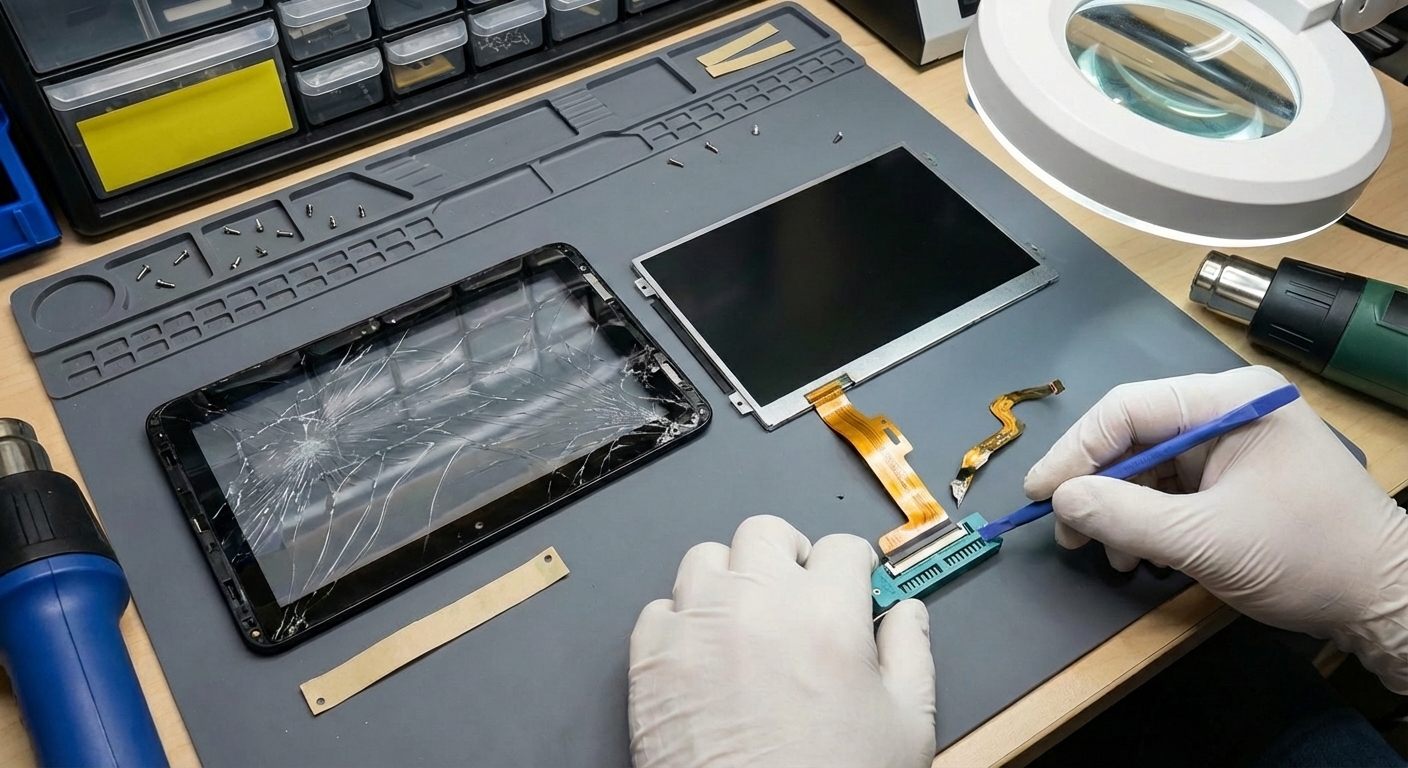
Touch hardware replacement depends on how the device is built. Many modern laptops and tablets use a laminated display assembly, where the cover glass, touch layer, and LCD are bonded together with adhesive. This improves clarity and reduces reflections, but it changes repair strategy. In those designs, shops often replace the entire display assembly because separating layers is slow, risky, and easy to ruin.
Some models, especially older systems, are built with separate parts: a touch panel (glass plus touch sensor) sits above a standalone LCD. In those cases, it may be possible to replace only the damaged layer. Even then, it is not always cost-effective once labor and failure risk are considered.
Common repair risks show up across both designs:
- Cracked glass: cracks can break the sensor grid and also create sharp edges that tear cables during disassembly.
- Adhesive and alignment: bonded screens need careful heat and prying, and reassembly requires even pressure and precise alignment to prevent light bleed and touch errors.
- Ribbon cables: touch and digitizer signals often run through thin flex cables that tear easily.
- ZIF connectors: small flip-lock connectors can snap, and a connector that is not fully seated can create intermittent touch, dead zones, or total input loss.
For exam purposes, one habit matters: verify part numbers and model compatibility before ordering. A display assembly can look identical but differ by connector type, resolution support, touch controller revision, or pen digitizer support. Matching the exact model and vendor part number prevents “fits but doesn’t work” repairs.
Inverters explained, why they matter and when you still see them
An inverter is a display power component you mainly associate with older laptop screens. Its job is simple in concept: convert low-voltage DC power from the laptop into high-voltage AC power needed by a CCFL backlight (a fluorescent tube). Without the inverter, a CCFL-lit LCD can still produce an image, but you won’t get usable brightness.
For the CompTIA A+ 220-1201 exam, inverters matter because the symptoms are classic and test writers still use them. In real workplaces, you see fewer inverter issues now since most modern screens use LED backlights. Still, older business laptops, legacy repair fleets, and refurbished devices can bring the inverter topic back into your day.
CCFL vs LED backlight, the key difference that changes the parts
The easiest way to remember the difference is the power path. A CCFL backlight needs an inverter to generate high voltage. An LED backlight uses an LED driver, which is often built into the panel electronics and may not be a separate, replaceable board.
This part difference changes troubleshooting and replacement strategy. With CCFL, a dim display can be caused by the inverter or by the aging fluorescent tube. With LED, the backlight circuit is usually tied closer to the panel’s internal power board, so field replacement often means the whole display assembly.
If you are trying to guess what you are dealing with, a few practical cues help:
- Age of device: CCFL is common in older laptops, especially many models from the 2000s and early 2010s. Most newer laptops and monitors are LED-backlit.
- Panel thickness and build: CCFL designs often appear in thicker lids with more internal space for the tube and inverter board.
- Color look at startup: CCFL backlights can look warmer or slightly uneven as they age, while LED backlights tend to look more stable when healthy.
- Brightness behavior: CCFL systems may show a slow brightness ramp-up after powering on, like a small “warm-up” period. LED backlights usually reach steady brightness almost immediately.
From an exam perspective, the key vocabulary is consistent: CCFL = inverter, LED = driver (often integrated). When a question mentions an “inverter,” assume a CCFL-backlit LCD unless it states otherwise. That single detail often points you toward the correct failure cause and the right next troubleshooting step.
Failure signs that point to an inverter or backlight problem
Backlight problems can be confusing because the LCD image and the backlight are separate. The LCD can still form the picture even when the light source fails. That is why “the screen is black” does not always mean “the panel is dead.”
These symptoms often point to an inverter or CCFL backlight issue:
- Very dim image you can see with a flashlight: The LCD is working, but the backlight is not. This is the classic sign tested on A+.
- Screen flickers, often linked to movement of the lid or changes in brightness.
- Screen goes dark after a second: Backlight starts, then shuts off. Protection circuits may cut power when they detect abnormal load, which can happen with a failing inverter or aging CCFL tube.
- Brightness controls do nothing: The LCD image remains, but changing brightness has little or no effect.
- Pink tint on startup: Common with aging CCFL tubes.